Worldwide Giveaway – Looking for a free alternative to Photoshop? Microsoft’s Windows Photos app offers powerful editing tools, including AI-powered features for Windows 11 users. Let’s dive in and see how you can make your photos pop using this app.
Getting Started with Microsoft Photos App
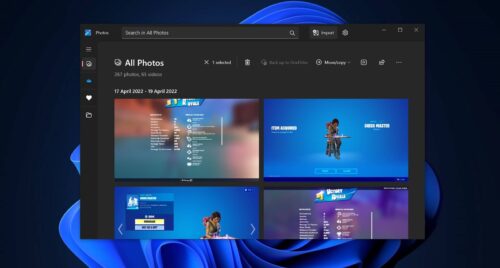
With the Microsoft Windows Photos app, you can view and organize all the pictures on your Windows PC. But beyond that, the app is packed with editing tools that let you fix and fine-tune your photos. Whether you want to crop an image, adjust brightness, apply filters, or remove blemishes, this app has you covered. Plus, with AI, you can blur, remove, or replace the background in Windows 11.
How to Get the Latest Features
Microsoft added AI-driven background options to the Photos app in Windows 11 Version 23H2, released in September 2023. Here’s how to ensure you’re up-to-date:
- Update Windows: Go to Settings > Windows Update > Check for updates. Install any available updates.
- Update Photos App: Open the Microsoft Store app, click the Library icon, select Get updates, and click Update all to update all your Microsoft Store apps, including Photos.
Cropping Your Image
Open the Windows Photos app and browse through your photo library. Select the photo you want to edit, then click the edit image icon (it looks like a photo) in the toolbar at the top. The app opens to the crop tool by default.
- Rotate: If the photo is in the wrong orientation, use the Rotate image icons to turn it 90 degrees clockwise or counterclockwise.
- Flip: Click the horizontal or vertical flip icons to flip the photo accordingly.
- Adjust Aspect Ratio: Click the Free icon at the bottom to see aspect ratio options. Choose one or manually adjust by dragging the handles on the corners and sides.
- Crop: Drag the handles on the corners or sides to crop the image, then drag it around the canvas to include the desired elements.
Adjusting Lighting and Color
To change a photo’s lighting or color settings:
- Click the Adjustment icon (looks like a sun).
- Move the sliders to adjust Brightness, Exposure, Contrast, Highlights, Shadows, and Vignettes.
- Under Color, adjust Saturation, Warmth, and Tint using the sliders.
Adding Filters
Enhance your photo by applying a filter:
- Click the Filter icon (looks like a paintbrush).
- Choose a filter such as Punch, Golden, Radiate, Warm Contrast, Calm, Cool Light, B&W, Burn, Film, Vintage, and more.
- Adjust the intensity of the filter with the slider, or click Auto Enhance to let the app choose the best settings.
Marking Up an Image
If you want to draw over your photo:
- Click the Markup icon (looks like a pen).
- Choose a pen tool or highlighter from the toolbar at the bottom.
- Draw on the photo. Use the eraser tool to remove any unwanted markup, or click Clear all markup to start fresh.
Retouching a Photo
To remove blemishes or blend them into the background:
- Click the Retouch icon (looks like an X).
- Adjust the size of the spot you want to remove using the Spot fix slider.
- Drag the floating circle to the area you want to fix and click. The spot should fade away after a few seconds.
Editing the Background of an Image
To change the background in a photo, use the built-in AI features:
- Click the Background icon (looks like a person).
- Blur: Click the Blur button and adjust the blur intensity slider. Use the Background brush tool to refine the blurred areas.
- Remove: Click the Remove button to erase the background, leaving only the subject. Use the Background brush tool for finer control.
- Replace: Click the Replace button and choose a color from the palette. Adjust the tone or enter a specific hex code or RGB value for a custom color.
Undoing Changes
To reverse changes:
- Click the Undo icon to undo the last action. Continue clicking to undo previous actions.
- Click the Redo button to redo the last undone action.
- Click Reset to revert the image to its original form. Confirm by clicking Reset again.
Saving Your Photo
Once you’ve finished editing, click the Save options button:
- Save as copy: Saves a duplicate, retaining the original.
- Save: Overwrites the original with the edited version.
- Copy to clipboard: Allows you to paste the image into another app or file.
There you have it! With these tools and tips, you can easily edit your photos and make them look professional using the Windows Photos app. Happy editing!