Setting up Starlink is relatively straightforward, but it does require some physical labor and technical know-how. Here’s a step-by-step guide to help you get your Starlink satellite internet up and running:
- Order your Starlink kit: Purchase the Starlink kit from a retailer or directly from the Starlink website. Make sure you have all the necessary equipment before starting the installation process.
- Find a clear view of the sky: The Starlink dish needs a clear line of sight to the sky to establish a connection with the satellites. Choose a location with an unobstructed view for optimal performance.
- Mounting the dish: Use the mounting tripod included in your kit to secure the dish in place. Follow the instructions provided carefully to ensure proper installation.
- Connect cables and power up: Connect the cables from the dish to your router and power up both devices. Make sure everything is securely connected before turning on your system.
- Set up your router: Follow the instructions provided with your router to configure network settings, create passwords, and connect devices to your new Starlink network.
- Optimize placement: Fine-tune the position of your dish for optimal signal strength. You may need to adjust its angle or direction slightly for better performance.
- Troubleshooting tips:If you encounter any issues during setup, refer to troubleshooting guides provided by Starlink or contact customer support for assistance.
setting up Starlink satellite internet requires some effort but can be done successfully with patience and attention to detail. By following these steps and guidelines, you can enjoy high-speed internet connectivity in even remote locations where traditional broadband services are unavailable.
Starlink Satellite Internet is a revolutionary service that provides high-speed internet access to users in remote or underserved areas. Setting up Starlink is easy and straightforward, but it’s important to do it the right way to ensure optimal performance.
First, you’ll need to sign up for the service through the Starlink app. There are no contracts involved, so you can pay on a month-to-month basis and cancel or pause your subscription at any time. The residential plan is suitable for most users, but there are also special plans available for nautical use or RV roaming.
The Starlink installation kit comes with everything you need to get started, including a dish with kickstand, a router base unit, power cable, and a 75-foot cable for connecting the router to the dish. Additional accessories like mounting hardware and Ethernet adapters can be purchased separately from the Starlink store.
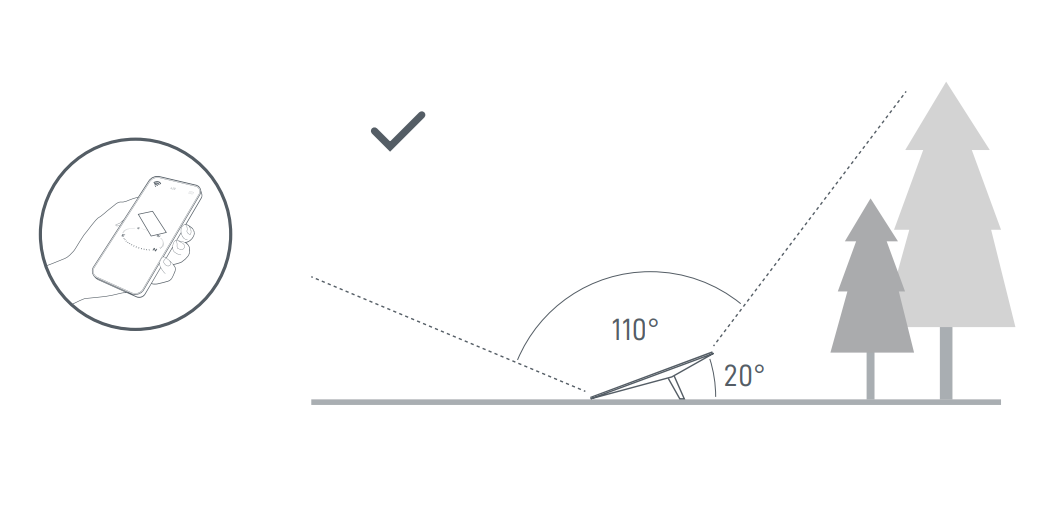
Before installing your Starlink dish, make sure you have a suitable location with an unobstructed view of the sky. You can use the Starlink obstruction app to scan the sky and find the best position for your dish. It’s important to have at least 110 degrees of obstacle-free space above and around the dish to maintain a connection with passing satellites.
Once you’ve found a suitable location, follow the instructions included in the installation kit carefully. Properly position and mount the dish using a Starlink mount, run cables through exterior walls if necessary, and connect everything according to the instructions provided.
By following these steps and setting up your Starlink satellite internet correctly, you can enjoy fast and reliable internet access wherever you are located.
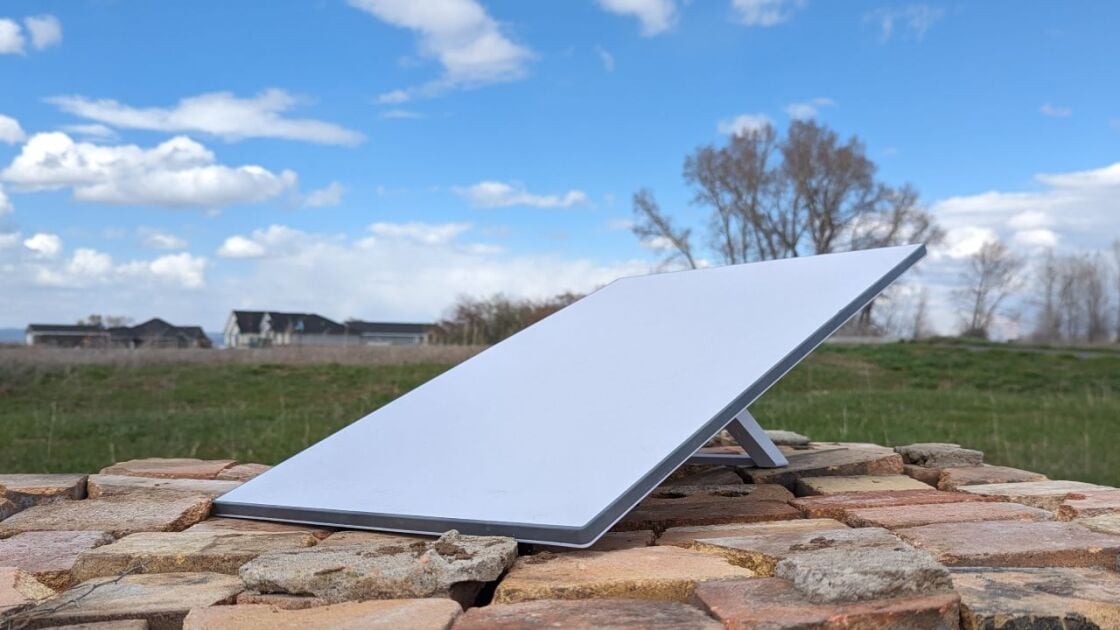
(Credit: Brian Westover)
3. Connect Starlink
Once you have found the perfect location for your Starlink dish and unboxed all the necessary components, it’s time to connect everything. Start by connecting the 75-foot Starlink cable to the dish and routing it to where you plan to place the router.
(Credit: Brian Westover)
The Starlink router is a sleek, white device that connects directly to the dish via an Ethernet cable. Once connected, plug in the power adapter and turn on both devices.
4. Set Up Starlink
To set up your Starlink internet service, download the Starlink app on your smartphone or tablet. Follow the on-screen instructions to create an account, register your hardware, and activate your service.
(Credit: Brian Westover)
5. Enjoy Your High-Speed Internet
Congratulations! You have successfully set up your Starlink satellite internet service. Now you can enjoy high-speed internet access from virtually anywhere with a clear view of the sky.
If you encounter any issues during setup or while using your new internet service, don’t hesitate to contact Starlink customer support for assistance.
By following these steps and setting up your Starlinke satellite internet correctly, you can ensure a smooth installation process and optimal performance from your new high-speed internet service.
Enjoy surfing the web, streaming movies and TV shows, playing online games, video conferencing with friends and family – all without worrying about slow speeds or dropped connections.
Happy browsing!
Getting Starlink satellite internet and setting it up the right way involves a few key steps. First, you’ll need to order your Starlink kit, which includes the dish, router, and necessary cables. Once you have your kit in hand, you can begin the installation process.
Start by finding a suitable location to mount your Starlink dish. This should be a spot with a clear 110-degree view of the sky. You may need to purchase additional mounting hardware depending on your setup.
Next, connect the router to power it up and establish communication with the dish. The router also provides power to the dish itself. Make sure to position the router in an accessible location for optimal performance.
Once the router is set up, you can connect the dish using the provided cable. This step allows you to power on and position the dish properly before mounting it permanently.
Mounting the dish is crucial for ensuring a stable connection. Depending on your installation setup, you may need specific mounts like ridgeline mounts or wall mounts. Ensure that there is enough cable length between the dish and router for adjustments.
After mounting the dish securely, use your Starlink app to scan and validate its position for optimal signal strength. Make any necessary adjustments before finalizing its placement.
By following these steps carefully and ensuring proper positioning of both your dish and router, you can enjoy reliable internet connectivity with Starlink satellite internet.
Setting up Starlink satellite internet is a relatively straightforward process that can be done by following a few simple steps. First, you will need to order the Starlink kit, which includes the dish, router, power supply, and cables. Once you receive your kit, you can begin the installation process.
The first step is to find a suitable location for the dish with a clear view of the sky. The dish should be mounted on a stable surface using either the included tripod mount or a longer cable if necessary. The Starlink app will guide you through positioning the dish for optimal satellite reception.
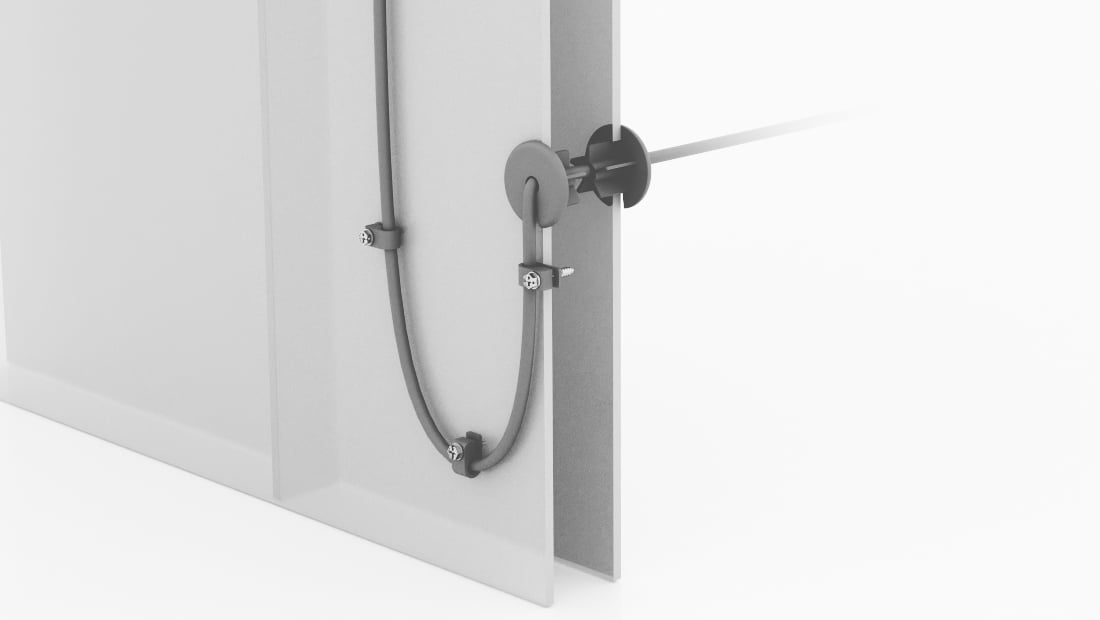
Next, you will need to run the cable from the dish to your home. For temporary setups, you can simply run the cable through an open window. For permanent installations, Starlink offers cable routing kits for running cables through walls or masonry surfaces.
Once everything is set up physically, it’s time to activate your Starlink service using the app. The app will walk you through connecting to satellites and setting up your Wi-Fi network name and password. It may take some time for your system to fully connect and download updates before it’s ready for use.
After activation, your Starlink internet should provide fast and reliable speeds. Initial tests have shown average download speeds of around 150Mbps with peaks up to 325Mbps. The system will continue to optimize its connections with satellites automatically over time.
setting up Starlink satellite internet is a simple process that can provide high-speed internet access in areas where traditional options may not be available or reliable. With proper installation and activation, you can enjoy fast and reliable internet connectivity wherever you are located.If you’re looking to get Starlink satellite internet and set it up the right way, you’re in luck. Starlink offers fast speeds, low latency, and reliable service that is perfect for gaming, working from home, video streaming, and more. With upload speeds of 23Mbps and latency below 30 milliseconds, you can expect a smooth online experience.
Setting up Starlink is easy – simply install the dish outside your home where it has a clear view of the sky. The dish-to-satellite connection takes care of itself, so you don’t have to worry about complicated setup processes. Once installed, the single router provided by Starlink should cover most homes with a strong Wi-Fi signal. However, for larger homes or unique construction styles, you may want to consider adding a second router as a mesh node or connecting to an existing mesh Wi-Fi system.
To get even more out of your Starlink experience, check out some tips for upgrading your setup. From weathering power outages to speeding up web browsing and using built-in content filtering features, there are plenty of ways to enhance your internet experience with Starlink. Additionally, explore guides on using the Starlink app, reaching customer service when needed, and even DIY cable repairs in emergencies.
If you’re still unsure about whether Starlink is right for you compared to other satellite internet providers, consider reading our latest review for an in-depth comparison. With its fast speeds and reliable performance over the years (including recent hardware upgrades), Starlink is a solid choice for those looking for high-quality satellite internet service.Starlink satellite internet is a revolutionary new way to access high-speed internet in remote or rural areas where traditional broadband options may be limited. To get Starlink satellite internet, you first need to sign up for the service on the Starlink website and place an order for the necessary equipment.
Once your order is confirmed, you will receive a Starlink kit that includes a satellite dish, router, power supply, and cables. Setting up Starlink is relatively straightforward but it’s important to follow the instructions carefully to ensure optimal performance.
To set up your Starlink satellite internet system, start by finding a clear outdoor location with a direct line of sight to the sky. Mount the satellite dish on a stable surface using the provided mounting hardware and connect it to the router using the included cables.
Next, plug in the power supply and turn on both the satellite dish and router. Follow the on-screen instructions on your computer or mobile device to complete the setup process and activate your service.
Once your Starlink system is activated, you can connect your devices to the Wi-Fi network created by the router and start enjoying high-speed internet access. Keep in mind that while Starlink offers fast speeds and low latency compared to other satellite internet providers, performance may vary depending on factors like weather conditions and network congestion.
setting up Starlink satellite internet is easy as long as you follow the instructions provided with your kit. With its cutting-edge technology and widespread coverage, Starlink is poised to revolutionize how people access high-speed internet in underserved areas around the world.
Starlink is a satellite internet service provided by SpaceX, which aims to bring high-speed internet access to rural and remote areas around the world. In order to get Starlink satellite internet, customers must sign up for the service on the official website and purchase the necessary equipment, including a satellite dish and router.
Setting up Starlink satellite internet the right way involves following a few simple steps. Firstly, customers need to find a suitable location to place the satellite dish, ensuring that it has a clear line of sight to the sky. The dish should be mounted on a sturdy surface, such as a roof or pole, and connected to a power source with the provided cables.
Once the dish is set up, customers can connect it to the router using an Ethernet cable and power on the system. After a few minutes, the satellite dish will align itself with the Starlink network, providing high-speed internet access to the connected devices.
It is important to regularly check for updates and maintenance tasks, as well as ensure that the dish is properly aligned and functioning correctly. By following these steps, customers can enjoy fast and reliable internet access with Starlink satellite internet.